
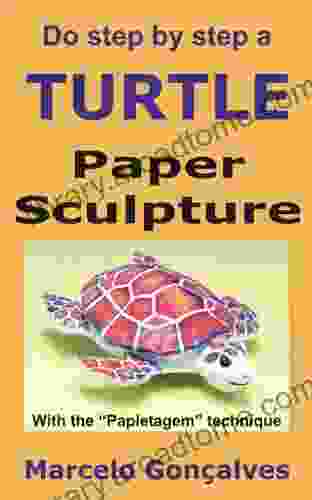
Do Step By Step Turtle: How To Create Paper Sculpture With The Papietagem

4.1 out of 5
| Language | : | English |
| File size | : | 1193 KB |
| Text-to-Speech | : | Enabled |
| Screen Reader | : | Supported |
| Enhanced typesetting | : | Enabled |
| Print length | : | 38 pages |
| Lending | : | Enabled |
The papietagem technique is a centuries-old art form that uses paper to create beautiful and intricate sculptures. In this step-by-step guide, we'll teach you everything you need to know to create your own paper sculptures, from choosing the right materials to finishing your masterpiece.
Materials
- Paper (newspaper, tissue paper, or kraft paper)
- Paste (homemade or store-bought)
- Water
- A brush
- A modeling tool (optional)
- A base (optional)
Step 1: Choose Your Paper
The type of paper you use will depend on the desired effect you want to achieve. Newspaper is a good choice for creating large, bulky sculptures, while tissue paper is more delicate and can be used for smaller, more intricate pieces. Kraft paper is a good all-purpose paper that can be used for a variety of projects.
Step 2: Make Your Paste
The paste you use will bind the paper together and give your sculpture its strength. You can make your own paste using flour and water, or you can Free Download pre-made paste from a craft store.
To make your own paste:
- Mix 1 cup of flour with 1 cup of water in a saucepan.
- Bring the mixture to a boil over medium heat, stirring constantly.
- Reduce the heat to low and simmer for 5 minutes, or until the paste has thickened.
- Remove the paste from the heat and let it cool.
Step 3: Tear Your Paper
Once you have chosen your paper and made your paste, you can start tearing it into strips. The strips should be about 1 inch wide and several inches long.
Step 4: Apply the Paste
Apply a thin layer of paste to the surface of your sculpture. Then, start applying the strips of paper to the surface, smoothing them out as you go. Overlap the strips slightly to create a strong bond.
Step 5: Continue Building
Continue applying strips of paper to the surface of your sculpture until it reaches the desired thickness. You can build up layers of paper to create different shapes and textures.
Step 6: Shape Your Sculpture
Once you have finished applying the paper, you can start shaping your sculpture. You can use your hands, a modeling tool, or a combination of both to shape the paper into the desired form.
Step 7: Dry Your Sculpture
Once you are satisfied with the shape of your sculpture, let it dry completely. This can take several hours or even days, depending on the size and thickness of your sculpture.
Step 8: Finish Your Sculpture
Once your sculpture is dry, you can finish it by adding paint, glaze, or other embellishments. You can also mount your sculpture on a base to give it a more polished look.
Here are some additional tips for creating paper sculptures:
- Use different colors and textures of paper to create unique and interesting effects.
- Experiment with different ways of applying the paper, such as crumpling it, folding it, or tearing it.
- Be patient and don't be afraid to make mistakes. Paper sculpture is a forgiving art form, and you can always start over if you don't like the way your sculpture is turning out.
Do Step By Step Turtle
Now that you know the basics of paper sculpture, you can start creating your own unique pieces. Here is a step-by-step guide to creating a turtle sculpture:
Materials:
- Newspaper
- Paste
- Water
- A brush
- A modeling tool (optional)
- A base (optional)
Instructions:
- Tear the newspaper into strips about 1 inch wide and several inches long.
- Apply a thin layer of paste to the surface of a small ball of newspaper. Then, start applying the strips of paper to the surface, smoothing them out as you go. Overlap the strips slightly to create a strong bond.
- Continue applying strips of paper until the ball is completely covered.
- Use your hands or a modeling tool to shape the ball into a turtle shape. Add a shell by applying strips of paper to the back of the turtle. You can also add legs, a head, and a tail by applying strips of paper to the appropriate locations.
- Let the turtle dry completely. This can take several hours or even days, depending on the size and thickness of your sculpture.
- Once the turtle is dry, you can finish it by adding paint, glaze, or other embellishments. You can also mount the turtle on a base to give it a more polished look.
We hope this guide has inspired you to create your own paper sculptures. With a little practice, you can create beautiful and unique works of art.
4.1 out of 5
| Language | : | English |
| File size | : | 1193 KB |
| Text-to-Speech | : | Enabled |
| Screen Reader | : | Supported |
| Enhanced typesetting | : | Enabled |
| Print length | : | 38 pages |
| Lending | : | Enabled |
Do you want to contribute by writing guest posts on this blog?
Please contact us and send us a resume of previous articles that you have written.


Light bulbAdvertise smarter! Our strategic ad space ensures maximum exposure. Reserve your spot today!


 George OrwellHundreds and Hundreds of Harry Potter Questions: Unveil the Secrets of the...
 Ted SimmonsScientific Heuristic Analysis of the Etiology of Baldness: How to Avoid Hair...

 Ian MitchellFollow ·17.9k
 Salman RushdieFollow ·19.1k
 Ken SimmonsFollow ·13.2k
 Fredrick CoxFollow ·12.3k
 Levi PowellFollow ·8k
 Cody BlairFollow ·12.8k
 Ivan TurgenevFollow ·7.5k
 Arthur MasonFollow ·9.5k
 Lord Byron
How to Be Creative in Textile Art: A Comprehensive Guide...
Textile art is a...
 Kenneth Parker
Master the Art of Grilling with "The BBQ Sauces Cookbook"
Are you tired of the same old...
 Jerome Blair
Teaching Ceramics Potter Manual: Unlock Your Inner Artist...
Imagine the satisfaction of crafting exquisite...
 Robert Frost
 Paulo Coelho
Liberating Yourself From Lyme: A Comprehensive Guide to...
What is Lyme...

 Banana Yoshimoto
Inspiring Art Explorations: Unleashing Creativity in...
Prepare to be inspired...
4.1 out of 5
| Language | : | English |
| File size | : | 1193 KB |
| Text-to-Speech | : | Enabled |
| Screen Reader | : | Supported |
| Enhanced typesetting | : | Enabled |
| Print length | : | 38 pages |
| Lending | : | Enabled |
